If you’re considering transitioning to digital document sharing through a virtual data room (VDR), (also known by many other names such as digital data rooms, virtual deal rooms, and more generally as due diligence software or even transaction rooms – although a virtual data room is much more than a simple transaction room) you may be surprised by how easy it is to make the switch from either a physical data room or a legacy VDR. Especially with trusted advisors to guide you, your organization can be assured of a safe and secure transition for your mission-critical files.
Best of all, you can complete the process in five easy steps.
Table of Contents
Toggle1. Choose Your Digital Data Room Provider
First, shop around and evaluate your options for a secure virtual data room provider. Take note that transaction rooms and services like Dropbox or Google Drive do not provide the security or the robust collaboration capabilities of a VDR.
When you look for a VDR, consider a service that offers:
- Flexible pricing – You want a scalable VDR with no hidden fees.
- Ease-of-use – A VDR should help streamline your workflow, not add time to your processes.
- Easy access from any browser – You shouldn’t have to download software or plugins to use your VDR. Plug-in free technology eliminates the need for software upgrades and minimizes external threats.
- Fast upload speeds – Don’t get bogged down in the finer details or clog up your servers with a lengthy download process. You should be able to upload your files quickly and get back to work.
2. Learn How to Use the Virtual Data Room
Your Customer Success Manager will provide customized team training on using your virtual data room. Training should take 45 minutes or less.
You will learn how to:
- Upload files
- Collaborate
- Track changes and save different versions of files
- Set user permissions
- Set up workspaces for each project, transaction, or account
- Collaborate within the system through updates, assignments, and FAQs
Your new virtual data room will be used for M&A transactions, due diligence, safely transferring business transaction files, intellectual property, and all confidential information in a secure way to facilitate business sales, restructuring, or anything else you need it for.
3. Upload Your Documents and Files
Once you’ve been onboarded in your virtual data room and received a walk-through from the provider, you should be ready to go. Document management support should always be available if you have questions about the process — especially when it comes to protecting your sensitive information or sharing something confidential.
If you have paper documents that must be transferred to your VDR, you can do the following:
- Scan in paper documents for easy upload
- Select digital files for upload
- Upload documents through your browser or use the desktop uploader tool, Safelink
- Make changes to files through Microsoft Office Suite
4. Invite Personnel to Join
Invite members of your organization to join the platform, and then customize permissions to give them the level of access they need.
It is important to note:
- Files are set to “private” by default
- Custom groups can be created to grant and revoke access as needed
- The CapLinked contacts function can be used to add users to groups (this can also be achieved using a – Salesforce integration)
- Groups can be added to Workspaces or files as needed
- Permissions can be set individually for files and folders or as a whole to Workspaces
- Permissions can be set to view, download, upload, or edit
Set and Remove Permissions as Needed
Whether you’re completing due diligence processes for mergers & acquisitions (M&A), managing mission-critical intellectual property or working with financial reports, you may need to let individuals within an organization view files and then revoke access when the project ends. Even files that have been downloaded can’t be viewed once you take away access.
5. Start Collaborating Within Your Virtual Data Room
You can upload and download files at any time once your new Virtual Data Room from your VDR provider is set up and ready to go. You can also collaborate directly within a secure Workspace.
You have the ability to:
- Correspond directly on documents — no downloads necessary, although you can also work within your favorite productivity software, such as Microsoft Office
- Track changes
- Communicate via instant messaging
- Send email updates (this is beneficial for those outside of your organization or workers who don’t have the CapLinked app open)
- Assign Q&As to subject-matter experts can answer specific questions securely
- Distribute FAQ notifications with important details to an entire Workspace
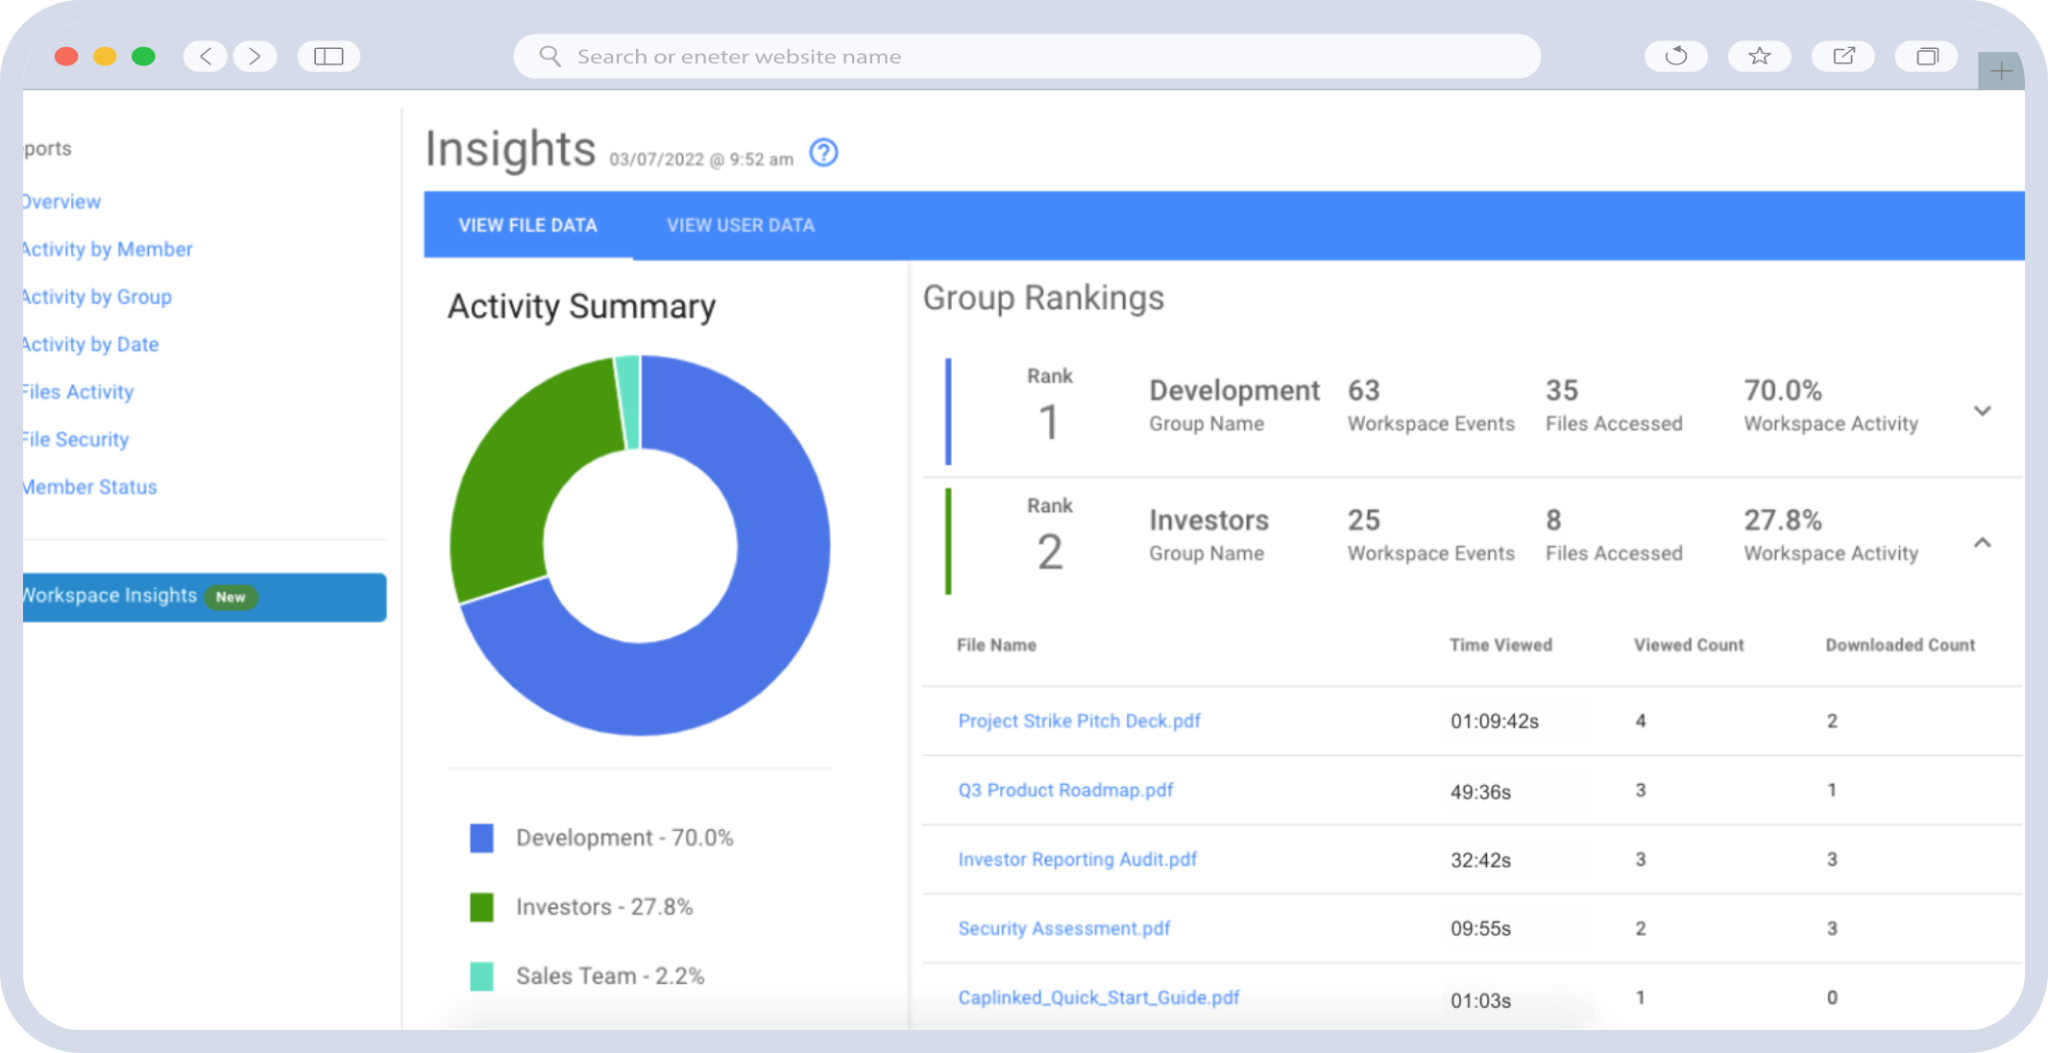
Track Usage and Activity
Once you’ve onboarded your team and started using your virtual data room software consistently, you may notice an increase in productivity thanks to streamlined workflows. At any time, you can generate detailed reports, maintain an audit to trail activities, locate past file versions and continuously manage digital rights.
Final Thoughts on the Transition to a Virtual Data Room Provider
Many companies are making the transition to digital document sharing through virtual data rooms. Establishing a VDR is easy to do with the right partners and software platform. Start your free trial to see how CapLinked can meet your VDR needs and now and into the future.
Dawn Allcot is a full-time freelance writer and content marketing expert specializing in technology, business and finance.